
There’s nothing I love more than bringing my kids into the kitchen! Whether to pass down old recipes, explore new ones or just to teach them how to make homemade strawberry jam instead of opening a pre-made jar. My kids eat a ton of Almond Butter and Jelly sandwiches, so learning how to make this easy strawberry jelly is a great skill to learn! Since this lesson, we’ve made all sorts of jams, jellies, and preserves… it really is so simple.
Easy Strawberry Jam
Sure, homemade jam is delicious but the real reason we love making this is because of how easy it is! Easy Strawberry Jam is a perfect recipe to get the kids in the kitchen with you while also saving money by making your jelly fresh instead of store bought. When strawberries are on sale, we stock up and make a batch to top our toast, baked into flaky dinner rolls or topped with ice cream. Often times we don’t even worry about making freezer strawberry jam because it gets eaten so quickly!
Related: Bionicos: Mexican Fruit Cups with Cream
Homemade Strawberry Jam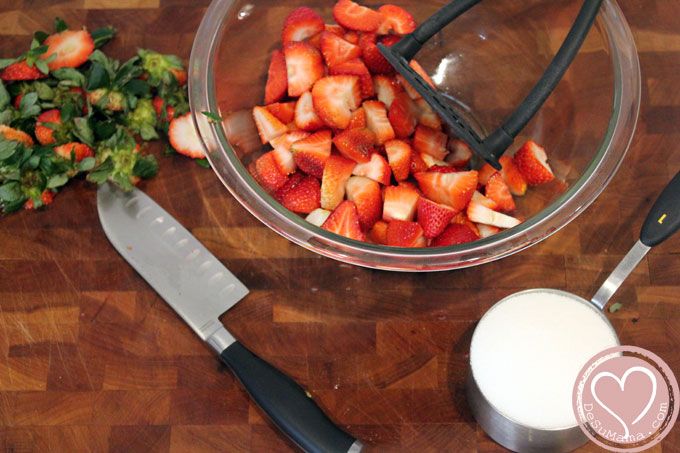
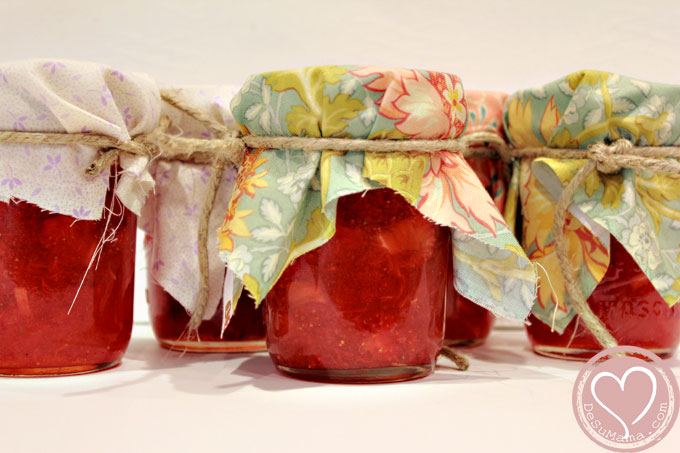
Strawberry Jelly
Making strawberry jelly is so easy – you’ll wonder why you ever bought it pre-made! I love that you can control the amount of sugar that is used, as well as the quality of the ingredients. Nothing beats homemade and, since learning how to make strawberry preserves, I no longer buy pre-made. It really is that quick and easy! Now I just buy whichever berries are in season and make my our jelly and jam using a combination of fresh berries we have on hand.
Here’s all you’ll need:
- 2 lbs fresh Strawberries
- 3-4 cups White Sugar
- 1/4 cup Lemon Juice
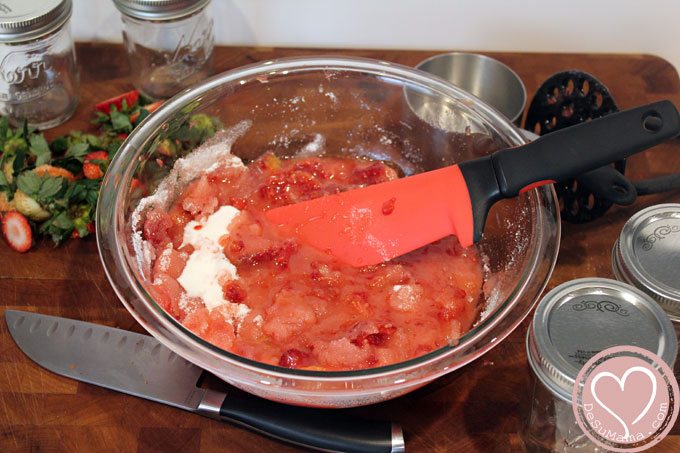
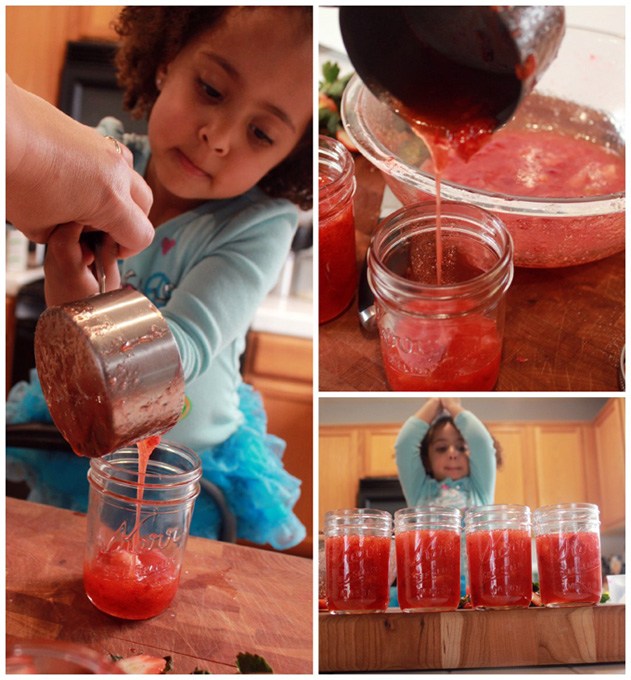
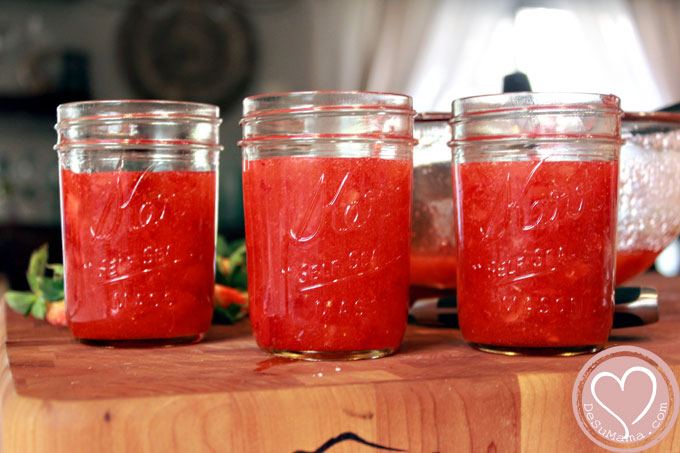
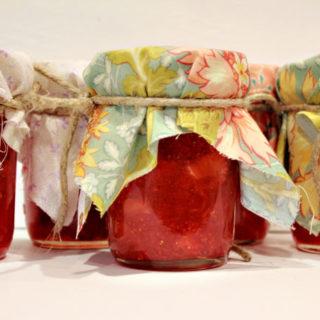
Prepare your strawberries by removing stem and core, then cut them into quarters. If you want a less chunky jam, mash the strawberries in a bowl before cooking. In a heavy saucepan, mix together the strawberries, sugar, and lemon juice. Stir over low heat until the sugar is dissolved. Increase heat and bring the mixture to a full boil. Stir often until the mixture reaches 220 degrees F and coats the back of a wooden spoon. Transfer to jars, leaving 1/4 to 1/2 inch headspace, and seal. Process in a water bath. If the jam is going to be eaten right away, there’s no need to process. Just refrigerate!
Related: Strawberry Mango Salsa
Freezer Strawberry Jam
Making strawberry jam was a great learning opportunity for Alina, as well. We worked on her small and gross motor skills as she attempted to pour the jam into the containers and stir our ingredients together. We counted our strawberries and scoops of sugar. We also pretty much always discuss kitchen safety, too. She loves working alongside me, and although it might slow you down a bit, cooking with your kids on a regular basis creates a foundation of legacy building and traditions. I know it can take patience, but the time spent in the kitchen with your little one is truly an investment. Once our end homemade jam was complete, Alina was as excited as I was to have whipped with a lovely batch of festive jam to share with our loved ones in Vegas.
How to Make Strawberry Jam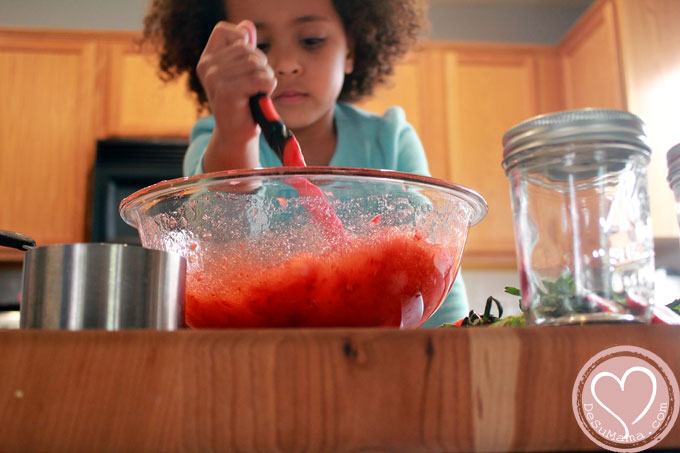
Strawberry Jam Recipe
Homemade Strawberry Jam
Making homemade strawberry jam is so easy – you’ll wonder why you ever bought it pre-made! You control the amount of sugar and the quality of the ingredients. Now I just buy whichever berries are in season and make my our jelly and jam using a combination of fresh berries we have on hand.
Ingredients
- 2 lbs fresh Strawberries
- 3-4 cups White Sugar
- 1/4 cup Lemon Juice
Instructions
Prepare strawberries by removing stem and core, then cut them into quarters. If you want a less chunky jam, mash the strawberries in a bowl before cooking. In a heavy saucepan, mix together the strawberries, sugar, and lemon juice. Stir over low heat until the sugar is dissolved. Increase heat and bring the mixture to a full boil. Stir often until the mixture reaches 220 degrees F and coats the back of a wooden spoon. Transfer to jars, leaving 1/4 to 1/2 inch headspace, and seal. Process in a water bath. If the jam is going to be eaten right away, there’s no need to process. Just refrigerate!